
Looking for ways to get your blog ranked on Google faster? Most bloggers don’t’ even realize that they neglect the crucial on-page SEO part of their process. They just write amazing content but completely overlook the technical details required by the search engines. As a result, their posts remain hidden on page five of the search results whereas their competitors with less worthy content end up ranking higher.
On-page SEO for bloggers is still very important in 2026. It is true that search engines have become smarter, but they still need to rely on clear signals. Your content should first of all be well-structured, with keyword placement and technically optimized. If you don’t have these things, even brilliant pieces of writing will remain invisible to the public.
That would be the end of this guide on optimizing your post for quick ranking, if you miss out on it. You will discover 12 practical measures that are currently quite effective. A work example and a tool that you can use right away are included with each tip.
1. Understand On-Page SEO for Bloggers

What is On-Page SEO?
On-page SEO is all about optimizing your blog post elements that the search engines can literally see and check out. That is, titles, headings, content, images, links along with technical factors. These are all elements that you are able to control directly, whereas the off-page factors like backlinks are out of your hands.
Search engines use crawlers to index your web page and determine its relevance to the query. They check if the content matches the user’s search intent. They also look at how information is organized. Besides that, they assess the technical side, such as how fast the page loads and whether it is mobile-friendly. Well-optimized pages make their job easier.
On-page SEO is like putting your resume in the right format for a job application. You have all the required skills and experience. However, if your resume is not formatted well, then no one is going to read it. By using proper structure and placing keywords correctly, the search engines are able to comprehend and rank your content.
Why On-Page SEO Matters More Than Ever
Competition has been growing exponentially in recent years. Every day millions of blog posts are published. Apart from quality content, technical perfection is necessary to distinguish oneself. Well-optimized pages that answer user intent are rewarded by algorithm updates.
Signals related to user experience such as page speed, mobile-friendliness, content structure have now a direct influence on rankings by affecting how long the visitors stay. When visitors bounce, rankings get a downward signal. However, when there is engagement, rankings are boosted. On-page optimization can enhance both by improving technical performance and user experience.
AI content creation has resulted in the web being flooded with low-quality postings. Google’s way of dealing with that is to prioritize content that clearly demonstrates expertise. Properly doing on-page SEO conveys a level of professionalism and thoroughness that separates the real bloggers from the content farms.
Featured snippets and position zero are the most visible and most winning positions in the search results. These top spots are granted to the content that is best structured and properly formatted. On-page optimization sets up your content to be a contender for these placements of great visibility. Being ranking third means next to nothing if position zero up to position two take all the clicks.
2. Keyword Research Like a Pro
Find High-Intent Keywords Bloggers Actually Rank For
High-intent keywords clearly indicate users that are very close to taking an action. A person typing the query “best running shoes” is probably just looking for some options. On the other hand, a person searching for “brooks ghost 15 vs asics gel nimbus 25” is getting ready to make a purchase. Choose keywords that show that users are ready to buy or have a very precise information needs.
Blogger-friendly keywords generally have search volumes in the range of 100 to 10,000 per month. Very broad keywords like “weight loss” bring too much competition. Very specific and narrow keywords like “weight loss for 34-year-old accountants in Denver” have virtually no searches. You have to find the right balance.
Look at your competitors’ ranking to uncover the possibilities. Identify blogs that have approximately the same size and reach as yours. Check out the keywords that get them to the first page of results. Use tools such as Ahrefs, SEMrush, or Ubersuggest to uncover these possibilities. Aim at the keywords that smaller blogs get success with.
Question-based keywords are extremely effective for bloggers. Users enter queries like “how to start a podcast” or “why does my sourdough not rise” when looking for an answer. Such queries have well-defined user intent and answering them fully is your road to becoming an authority and successful in getting rankings.
Identify Low Competition Opportunities Using Tools
Keyword competitiveness scores assist you in deciding what keywords to target. In general, SEO tools rate competition on a scale from 0 to 100. Beginners should focus on keywords with difficulty below 30. Intermediate bloggers can handle a difficulty between 30 and 50. Except for extremely authoritative websites, the difficulty levels for 50+ keywords are not for you.
Google Keyword Planner has the advantage of showing you keyword information for free directly from Google. It displays search volumes and competition levels for any term. The interface is not as sophisticated as paid tools but the data obtained can be relied upon as a good basis.
Answer the Public produces a very large number of questions in a wide variety of categories that cover any topic imaginable. If you enter “content marketing” you will get numerous “how to,” “what is,” and “why does” type questions. Such questions are an excellent source of potential post topics.
Google Search Console allows you to see the keywords that your website is already ranking for, but on pages 2-3 instead of page 1. These are the low-hanging fruit and by optimizing your posts around these terms, you can usually expect to see them rise to page 1 sooner rather than later.
Long-Tail vs Short-Tail Keywords: Which to Target
The short-tail keywords are composed of only one or two words. “Yoga” or “email marketing” are examples of short-tail keywords. They bring huge search volumes but their competition level is extremely high which means that only websites with very high domain authority and lots of backlinks will be able to rank for them. New websites simply cannot compete for such keywords.
Long-tail keywords, by contrast, are made up of three or more words. “Yoga for lower back pain beginners” is a very specific long-tail keyword example. Search volume is lower but the competition almost becomes nonexistent. Users searching using long-tail queries are typically highly specific which means that they tend to convert better than the ones who are just browsing.
The newbie bloggers should think in terms of 70% long-tail and 30% short-tail keywords. While long-tail ones will help new blogs to attract users and become recognized in their niche, as the website grows, a gradual move towards the more generic short-tail keywords should be made. Instead of fighting very hard battles right from the start, this way you will first get some momentum built.
When it makes sense, you can combine both types of keywords within only one post. A post that targets “keto diet meal prep” (long-tail) can still rank for “keto diet” (short-tail) if only the content covers the subject broadly enough. In this case, you are writing to fulfill the specific long-tail intent but at the same time you are naturally including broader context.
3. Blog Post Title and Meta Description
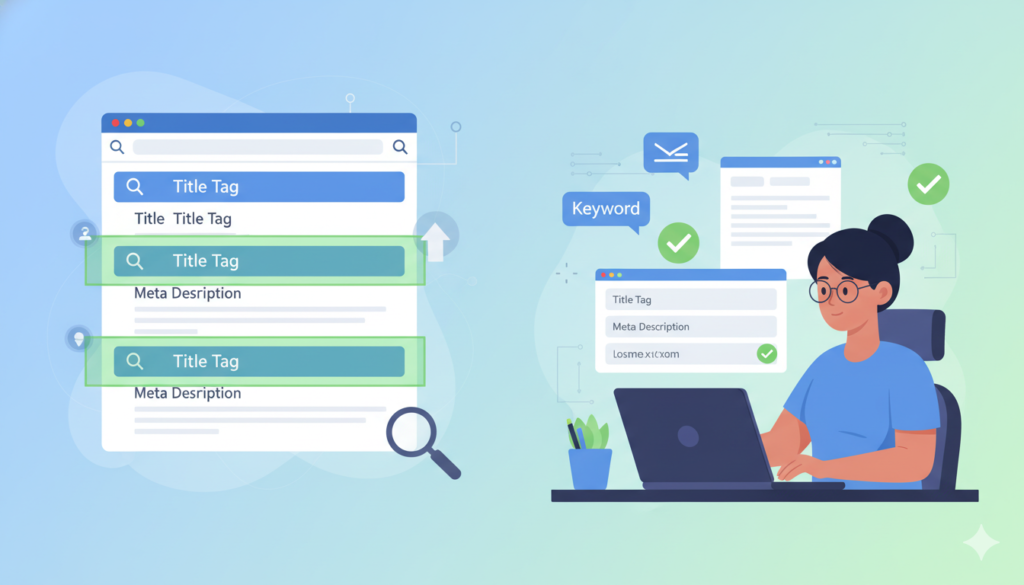
Craft Click-Worthy Titles That Rank
Titles have to please both the search engines and the readers. Search engines need a clear keyword signal whereas humans want to be enticed to click. Aim at striking a balance between the two sides that will bring your maximum benefits.
Primary keywords should be placed close to the titles’ front. “On-Page SEO Checklist for Bloggers” is a better title example than a longer and less keyword-focused “The Complete Checklist Bloggers Need for On-Page SEO Success.” The keywords in the beginning of the title help the search engine to make an immediate connection with the query.
Titles should be shorter than 60 characters so that their entire length is shown in the search results. If titles are longer, they are cut off and replaced with “…” making them less attractive. Every character matters. Eliminate filler words that add no value.
Numbers and brackets can be very effective at increasing CTR. “12 Steps to Rank Faster” performs better than “Steps to Rank Faster” in tests. Brackets like [2026 Guide] or [Proven Methods] are fancy and add specificity without increasing characters count.
Power words work on emotions which in turn trigger the readers to hit clicking buttons. Words like “essential”, “proven”, “ultimate”, or “secret” add an element of curiosity. Don’t overdo it. If used excessively power words come out as if you are desperately trying to bait the readers.
Write Meta Descriptions That Drive CTR
Meta descriptions have not been confirmed as a ranking factor, but they do have a significant influence on click-through rates. A high CTR is a signal of relevance to Google which leads to the rankings being indirectly boosted. Meta descriptions should be written to generate immediate interest in the user and thus lead them onto the next step which is knowledge acquisition (e.g. clicking the link).
Descriptions should preferably be limited to about 150-160 characters in length. This is the typical amount of text displayed by Google before it gets truncated. Mobile devices display less than desktop computers. Put the most persuasive arguments first.
Primary keywords should be included naturally in the meta descriptions. Google highlights in bold those words that match the query. Bold text both attracts the users’ attention and strengthens the perception of relevance. Don’t awkwardly jam keywords together just to get them all in.
Write descriptions in an active voice and speak directly to the reader. “Learn how to get your blog posts ranking faster” is a better phrase than “This article discusses blog post optimization techniques.” Talking directly to the reader makes messages seem more personal and therefore a bit more actionable.
Clearly state the benefit or promise that the user will get/receive. A good example would be a one-sentence meta description like “Discover 12 actionable steps that improve rankings within weeks” which sets the expectations and, at the same time, exudes the sense of urgency.
Best Practices for Including Keywords
Use exact-match primary keywords once in titles and once in descriptions. Overdoing this will make your text look spammy, even if it doesn’t add any value. Besides, search engines have become so smart that one-time occurrence of a keyword in a piece of content is enough for them to understand its relevance.
Make sure semantic variations have been incorporated across the article naturally. If the main keyword is “on-page SEO,” then also include instances of “on-page optimization” and “SEO techniques.” This reveals that you have been covering the topic comprehensively and nothing in your content has been stuffed with keywords.
Do not take keywords to extremes. “Best on-page SEO on-page optimization for on-page techniques” not only reads awfully but also makes you vulnerable to spam filters. Address users first with your writing. Content naturally gets keywords when it actually serves the users.
4. Use Headers Strategically (H1, H2, H3…)
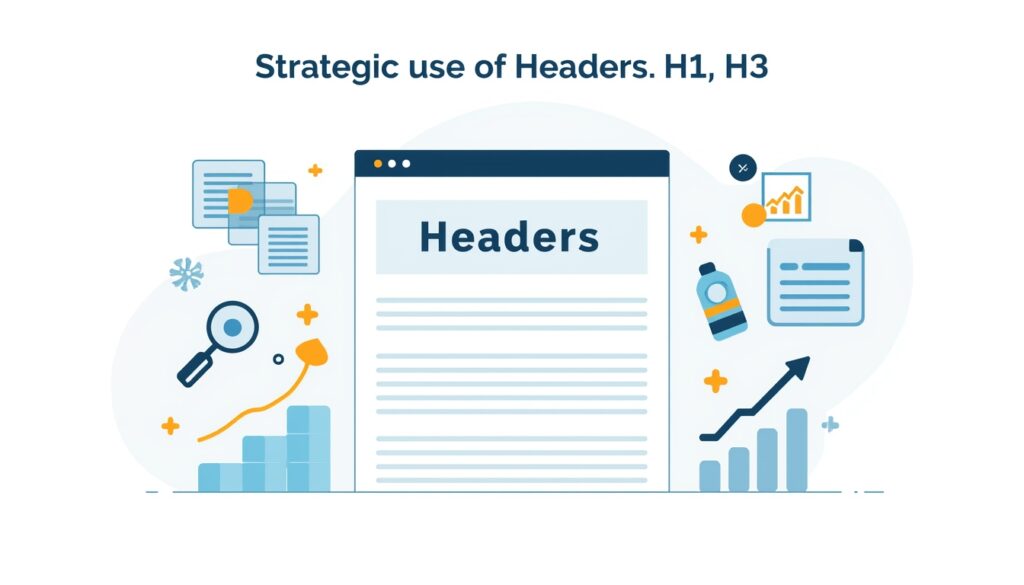
Organize Content for Readers and Search Engines
Your content can be easily digested if it is divided up into sections with headers. Headers also show the visual hierarchy of the content, therefore helping readers to navigate through the post. On the other hand, search engines use headers to understand the layout of the content and how many topics are covered.
H1 tags work as the central titles. It is advised to have one H1 only per page. This helps search engines know what your main topic is. Most blogging platforms take the post title and automatically format it as an H1 tag. You should never add a second H1 tag in the middle of the content manually.
H2 tags separate the content areas that are major sections. These are the different main subtopics of the H1. Three topics chosen for an email marketing post can be “List Building”, “Email Design”, and “Automation Tools”, each of them being an H2 heading. A different concept is thus introduced by each H2.
H3 tags are a further breakdown of the H2 sections. They give specific details for each major section. For example, under “List Building” H2, you will come with “Lead Magnets,” “Landing Pages,” and “Opt-in Forms.” for your H3s.
H4, H5, and H6 tags are used when you want to denote the content with plenty of depth. Even most blog posts would be fine with just H3 or less. Highly technical and complicated manuals or tutorials might be examples of using H4. Do not just create redundant header levels for the sake of having them.
With proper hierarchy the content is also more easily scannable. Readers make a quick scan and follow only the headers that look relevant to them. With clear layout they remain engaged for a longer time. They bounce less and this sends a signal of quality to the search engines.
How to Include Keywords Naturally in Headings
Make sure that the primary keyword is part of at least one H2 heading. This thus allows the topic of the article to be established without the risk of over-optimization. For instance, going after the keyword “on-page SEO checklist,” an H2 headline like “Essential On-Page SEO Checklist Steps” would be an ideal choice.
Along with the different H2 and H3 headings,use the keyword variants. This, consequently, shows that you have gone over the topic thoroughly. Examples of variations are “on-page optimization,” “SEO techniques,” “blog post optimization,” etc. which add to the semantic relevance.
Headers that are written with the actual readers in mind will naturally get more attention. “How to Include Keywords Naturally in Headings” is much better than “Keywords in Headings SEO Best Practices Optimization.” The first header is a proper sentence friendly to human readers while the second one is stuffed with keywords.
Balance the inclusion of keywords in the headers. If all the heads have them the text becomes really hard and repetitive to read. Definitely, don’t put keywords in all headers. Keyword-rich headers only need to be one, two, or three in number. The rest of the headers should be all about explaining their sections clearly.
Question-based H2s are remarkably good. “What Is On-Page SEO?” or “Why Do Headers Matter for SEO?” are the kinds of queries Correspond to user searches. Featured snippets often take Google’s answers from such sections.
5. Optimize URL Structure
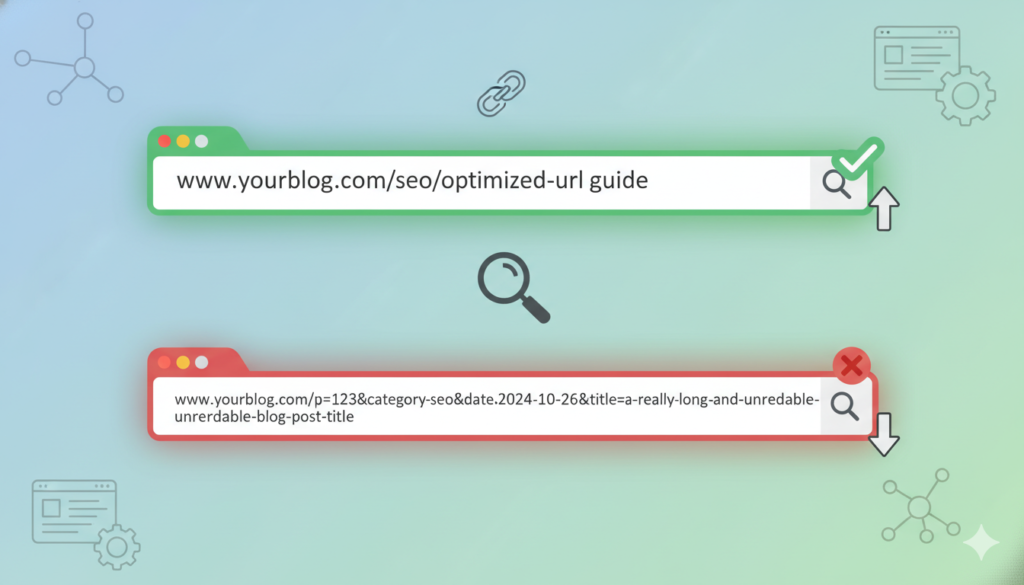
Keep URLs Short, Descriptive & Keyword-Friendly
The structure of a URL is among the factors considered by Google when ranking the page and people are also more willing to click on clean URLs. Only URLs that are simple and straightforward go a long way in building trust by users. On the contrary, a URL with lots of numbers and parameters appears as though it’s suspicious.
If possible, the primary keywords should be present in the URL. If your blog post is about email marketing, you should use a URL such as “/email-marketing-tips” and not the likes of “/post-12345” or “/p=?467.” Putting keywords in URLs is a good signal for relevance and, at the same time, it also improves your CTR in the search results.
Try to keep the URLs within 60 characters limit. Shorter URLs are not only easier to remember but they also get displayed well on any platform. URLs that are too long can always be truncated for social media sharing or email clients.
Hyphens must be used to separate words that form web addresses, not underscores. This is because search engines recognize hyphens as word breakers. That is why a word string like “email-marketing” will be read as two words. The word string “email marketing”, however, will be read as one which reduces the power of the relevance signals.
Fluff words should be eliminated from URLs. These are words that do not add value from an SEO point of view. Such words are {“cup”,”a”, “the”,”and”,”or”, “but”} etc. A URL like “/on-page-seo-checklist” is much better than “/the-complete-on-page-seo-checklist-for-bloggers.” The former is simple, concise, and to the point.
Don’t Use Stop Words and Unnecessary Numbers
Stop words are tongue twisters as far as SEO is concerned. These are function words such as conjunctions (and, or, but) and prepositions (about, by, at) as well as articles (a, an, the). Removing stop words from a URL definitely makes it shorter and it also helps getting to the point sooner.
In the future, date-based URLs are going to be problematic. A URL like “/2026/01/seo-tips” is definitely going to be seen as outdated in a year or less. Unecumbered by such strings of numbers, evergreen content tends to perform better. The visitors are inclined to think that content dated with recent times is what they’re offered.
Category-based URL structures are a good method for large websites with well-established hierarchies. On the other hand, “/blog/seo/on-page-optimization” would be a perfect way to describe a blog post for a site that has hundreds of posts across multiple categories. With small blogs, URLs should be kept flat and simple.
Make sure you do not change URLs after you have gone live. Broken links do both SEO and user experience a lot of harm. If there is no other choice but to do the URL, make sure that 301 redirects from the old to the new address have been implemented. By doing this, you will be preserving link equity and also avoiding 404 errors.
Read More: 6 Personal Finance trends 2026 : That Will Define Money Trend in 2026
6. Improve Content Quality

Focus on User Intent
It is user intent that determines how successful content is going to be even more than the topical optimization using keywords. It can be that a user who is looking for “running shoes” wants to see buying guides, reviews or simply information. In that case, knowing intent will help you in creating the content best suited to their needs.
Informational intent is when users want to acquire knowledge. They look for the facts, concepts, procedures, etc. that they are interested to know about. Informational requests are mostly fulfilled through blog articles, tutorials, and reference guides. With comprehensive educational material, you can target such queries.
Navigational intent is all about websites or pages that users want to get to. They type in a brand name or product name. In such cases, the searcher already knows where he is heading. Bloggers are unlikely to be competing for navigational queries.
Commercial intent is related to the phase when one is in the process of making a purchase decision. Users read different product features, customer reviews, and compare prices. Examples of queries with commercial intent include “best email marketing software” or “Mailchimp vs ConvertKit.” Posts of comparison and review will come in handy here.
Transactional intent is a stage when the user is ready to purchase. They search “buy running shoes online” or “WordPress hosting discount.” Such users want product pages, not blogs. As a blogger, here you should focus on the first three intent types.
To get a thorough understanding of the intent, analyze the pages that rank at the top. Type in the keyword you want to target. Go through the results on the first page. Are they mainly listicles, tutorials, or reviews? Opt for the dominant content type. No point in writing a review if the search results are dominated by guides.
Include LSI Keywords for Better Relevance
LSI stands for Latent Semantic Indexing and LSI keywords are the ones that are associated with your main keyword in some way. They signal to the search engine what exactly your content is about and how in-depth it is. For example, a post on “apple” can be about the fruit or a technology company. LSI keywords will thus help in clarification of the post’s meanings.
You can identify LSI keywords by doing Google searches. When you enter your main keyword, look at the “People also ask” and “Related searches”. Both these features are respectively populated with questions and phrases that reflect the semantic field of the main keyword.
If you use LSI keywords, there’s no need to overuse your main keyword. Don’t stuff your content with repetitive keywords in an attempt to make it look more SEO-friendly while you might just turn the readers off. LSI keywords accomplish the same goal of signaling your topic and your expertise to the search engines.
The likes of LSI Graph or standard keyword research software with LSI feature can be used for generating LSI keywords. You enter the main keyword of an article and then the program randomly generates related keywords in dozens. You then pick 5 to 10 of the most relevant ones and add them to your content accordingly.
Don’t get obsessed with the notion of keyword density. The truth is that no one can tell the exact keyword ratio. Speak naturally as you touch the topic fully. Those other related words will appear automatically when you have a deep understanding of the topic.
Add Original Images, Videos, and Infographics
Visual content does wonders with engaging readers and increasing the average time they spend on the page. These are both ranking signals. Posts that have at least one image get 94% more views than content with no visual element.
You can get the best of both worlds by using original visuals and stock images. Creating your own screenshots, diagrams, and photos is one way to show that you have real expertise. Stock images just serve as nice visual breaks but they won’t really make your content stand out.
Videos, especially if they are instructional and explanatory, usually lead to longer times spent by the visitors. You can embed videos from YouTube but if you decide to host videos on your own server, you will be keeping the visitors on your site longer.
An infographic manages to save the reader’s retentive capacity by condensing the content into visuals. It is a chart of data, a flowchart of a procedure, or a table of pros and cons. Infographics that are very shareable naturally bring in backlinks. Use Canva or Venngage to make simple infographics.
Try to insert visuals wherever it is possible without disturbing the flow of the text. 200 to 300 words between each visual is generally considered a good rule or thumb. Differentiate your images, videos, and graphics by using them alternatively.
7. Internal and External Linking Strategy

How Internal Linking Boosts SEO
Internal links are hyperlinks that point to other pages within your website. By linking posts together internally, you spread the ‘juice’ that comes with backlinks, create a clear site architecture, and allow the search engine bots to find and index all your pages more efficiently. Hence, good internal links can be a real blessing to your SEO efforts.
Make see to it that you also link from your pages with high authority to the new ones. The quantity of link equity your home page and popular posts have is usually quite significant. When you link these to new posts, you pass authority and thus the rankings get improved quickly.
The anchor text should be descriptive and contain relevant keywords. For example, “keyword research learn more” is better than “click here” because it helps search engines get a better idea of the content that is being linked to.
Content clusters are a great way to group your articles together by topic. Pillar pages are long comprehensive posts that target broad keywords. Cluster posts cover very specific aspects of the topic. Each cluster post links back to the pillar post and also to one or more related cluster posts.
Three to five internal links is an ideal number to target in each post. Less than that would mean missing out on a lot of opportunities whereas having too many would make the readers loose interest and the link juice gets spread to thinly. Only link to the places where it is really relevant and helpful to your readers.
If you happen to have any broken links within your website, prioritize the fixing of those immediately. When a user encounters a broken link, that is a dead end for them and consequently the frustration will grow. Search engines also consider broken links as a waste of link juice. You can use a tool such as Broken Link Checker or Screaming Frog to scan your site for broken links.
Use External Links to High Authority Sites
Outgoing links or simply external links refer to hyperlinks that point to other websites. The provision of sources, extra resources, or explanations is the main aim of external links. When Google looks at external links from this angle, it is actually considering them as reputation markers.
So, whenever you make a statement that you have to back up, link to authoritative sources who study or report your findings. An academic paper, data from the government, or a research from top players in the industry will enhance your credibility. It will demonstrate that you have done the homework and hence the legitimacy of your statements.
Limit the number of external links you use. In a post, 2-4 external links are adequately enough. If there are too many external links, then the visitors will be lead away from your site excessively. Always link when it is genuine in term of adding value to the reader.
The best user experience that you can offer to your visitors is by opening external links in a new window. So, when the user’s level of curiosity is satisfied after clicking on one of your links to go to external sites, your site is still there and that is very convenient. Most users prefer it that way. Do not forget to set the links as ‘open in new tab’ or add target = ‘_blank’ attribute to the external anchors. Don’t link directly to a competitor for the similar content.
After all, why add a direct link to the competitor’s blog if they are basically covering your same topic with their post? Instead, link to complementary resources or to authoritative data sources.
Make it a habit to frequently check the destinations of your external links. Websites change their content, move pages, or sometimes they disappear completely. Having broken external links conveys a bad image of the website and also fails the user’s expectations. Ideally, review and update them on a quarterly basis.
Avoid Broken Links
Nobody wants to click on a broken link leading to a 404 error page, do they? So, broken links kill both the SEO and the user experience. Search engines see tons of problematic broken links as an indication of a poor site maintenance standard.
Get a broken link checker that works as a plugin. There are WordPress plugins like Broken Link Checker that will automatically look through your site and send you notifications when they detect issues so you can get on and fix them. By doing so, you keep your site in good shape, ready to roll, while also helping visitors stay happy.
Update or delete broken links instead of leaving them as they are. When the destination changes, then you look for the new URL and update it. If, on the other hand, a resource disappears, then you either remove the link or you find another suitable source.
Before you publish, run tests on all your links. One by one, click through links in your drafts and check whether they function properly. This very simple action saves you from most broken link problems.
8. Optimize Images for SEO

Use Descriptive Alt Text
Alt attributes are meta descriptions that search engines and screen readers can use to get the gist of an image. It can be said that alt text makes your website more accessible for visually impaired users; on the other hand, it also provides context for images not loading and still provides SEO benefits by including relevant keywords.
Describe what you see in the image by using Alt text. A photograph with a “Woman running on beach at sunrise” will be more comprehensible. Avoid using generic alternative texts like “image123.jpg” or not filling the alt attribute.
When relevant and natural, use the keywords in the alt text. Let us say you have a picture with a checklist of items for an on-page SEO post and the alt text reads “blogger checking on-page SEO optimization steps.” While it is a good idea to use keywords in some of your images, you should also be careful not to insert them in pictures that aren’t really related.
Keep alt text short, not more than 125 characters, because screen readers will cut off longer descriptions. A brief explanation is usually better than an overly wordy one.
Don’t use words that don’t add any value like “image of”, “picture of”. These are obviously unnecessary and thus waste your limited characters. Just go straight to describing the image: “email marketing dashboard with open rates”
Compress Images for Faster Loading
When image files are very large it takes a lot of time for the web page to load. Slow loading pages also hurt your rankings and the visitors get frustrated. Hence, you should compress your images before uploading.
Online tools like TinyPNG, ShortPixel, or ImageOptim are great for compressing images that you want to post on a website. Their algorithms compress files by 50-80% without significantly hurting the quality of the images. Most of the time, these changes are not even noticeable to human eyes.
Sometime when possible, keep the image files size less than 100KB. A large one such as a hero image is really allowed to take 200KB. However, most inline images should tend to stay well below the 100KB mark. The smaller the files the faster they load regardless of the type of Internet connection used.
Resize the photos to the dimensions you will use to display the image before uploading it. Uploading a photo that is 3000px wide but only showing 800px is a bad practice. Use photo editing software to scale the picture to the actual size it will be displayed at.
When the images are located below the fold, enable lazy loading. It means that only those pictures that an Internet user reaches by scrolling are loaded. Thus, the initial loading of the page is much faster as images outside the viewport have been deferred.
Use WebP or Next-Gen Formats
The image format WebP provides better compression than JPEG and PNG. In terms of file size, it lowers the size by 25-35% while the quality is retained. Most modern head browsers support WebP fully.
You can convert your images to WebP with the help of online converters or plugins. WordPress plugins such as Smush or Imagify will automatically take care of conversion. You should serve WebP versions to browsers that support them while having JPEG or PNG fallback for older browsers that don’t.
AVIF is a new image format that offers even better compression than WebP. Its browser support is increasing but it is not yet universal. When the support reaches at least 80%, you can look at AVIF properly for optimization purposes.
Make sure that you test the support of the image formats on the site and check the display. It might well be the case that certain older browsers or computer systems are not compatible with the newer versions of the images. Fallbacks should be implemented if you want to cover all your visitors.
9. Improve Page Speed and Mobile Responsiveness
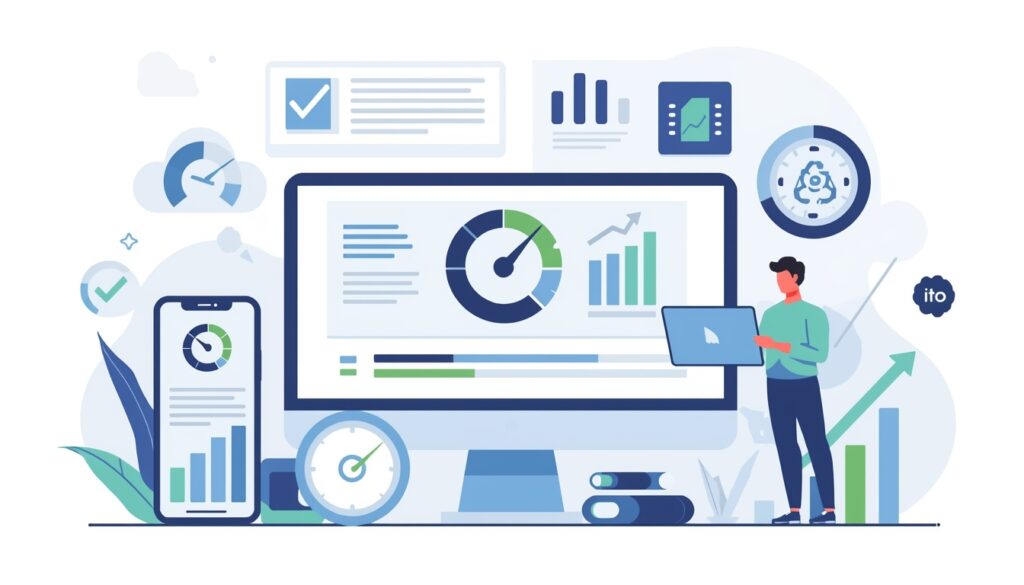
Tools to Test Blog Speed
The faster the page load speed is, the better rankings, and user experience will be. Google has officially made public that the speed of your page is one of the criteria used to rank pages. Apart from that, users are going to abandon your site if it takes too long to load even before 3 seconds have elapsed. So, you need to regularly test the speed of your website so that you may be informed about its performance and can decide on whether to take any measures or not.
Google PageSpeed Insights is a speed analyzer which is free of charge. You have to type in your website address in order to be provided with two scores which are, one for mobile and the other for the desktop version. Besides that, the tool identifies the causes of the problems that make your site run slow so you can get rid of them.
GTmetrix is another service that will provide you with a detailed report on your site performance. You will know the load times, the sizes of the page, and number of requests. What will be most eye-opening is the waterfall chart which signals out the heaviest elements on your page load. The level of testing departs a bit from the basic with free user accounts. If you want to access monitoring and historical data you need to go for paid membership.
With Pingdom Website Speed Test, you can check the loading time of your site off a number of different global locations. You should select test servers that are geographically close to your target audience. Even though it might be that a site loads very quickly in New York, this does not mean that it will be so in Tokyo. Geographical testing reveals the performance of the site from a regional point of view.
WebPageTest lets you perform advanced testing. You are allowed to specify connection speeds, browsers, and devices. It is also possible to run 3-5 times to get an average instead of a single run which may be an anomaly. A couple of tests will provide a better idea about your site’s performance.
Load time of fewer than 3 seconds is what you should be targeting. The faster the better, with 1-2 seconds giving the users the best experience. When the site takes more than 3 seconds to load is when you can even see the quite drastic increase in bounce rate.
Tips to Reduce Bounce Rate and Improve UX
The bounce rate is a metric that shows the number of visitors who left a website after viewing only one page. A high bounce rate indicates a negative user experience and it is one of the factors search engines consider in determining if the content is of high quality or not.
Focus on above-the-fold content first. It determines whether or not visitors to your site will stay and it is what they are going to see first. Put headlines that grab attention, your offer that is clear, and interesting images at the top of your page. Your visitors should be hooked within 2 seconds.
The use of plenty of white space is a great way to help readers relax and settle in. Nowadays, people are not willing to read through long and dense paragraphs so you really need to break them down. You should keep the length of your paragraphs between 2-4 sentences on average. Then, separate the sections from each other by adding line spacing. The readability of your writing will be dramatically improved by a visually pleasing layout.
Implement navigation menus that are easy to see and understand. When the users want some related content, they need to be able to find it without much hassle. Sidebar widgets, footer links, and contextual recommendations keep users exploring. With each additional page view, the bounce rate goes down.
Get rid of intrusive popups and interstitials. Nothing is worse than getting your content completely covered by a pop-up right as you enter the website. If you are going to use popups, then make sure you give the visitor a 30-60 second delay so that the users can first consume your content. Google penalizes mobile popups that cover the entire screens.
Content needs to be perfectly aligned with search intent. If the visitors are coming from search, they expect certain information. If they don’t see it right away, they will go back to the search results. You need to deliver the value you promise in the first paragraphs.
Mix in multimedia content that is entertaining and adds to the overall theme such as videos, images, and interactive elements. Your visitors are sure to stay longer if you keep showing them different types of content. Interest over time is maintained by the mix. On the other hand, monotony, which is one of the causes of people leaving, gets prevented.
The last thing you do after the first is obviously making the readers take the next step. Just show them the way you want them to go by placing the strong CTAs all over your posts. Here, you lead the readers to the related content, to subscribe to your newsletter, or to product pages which is good for branding and sales. Every CTA points out the next step clearly instead of leading to a dead end.
Read More: Top 10 Free Productivity Tools Every Student Needs
10. Use Schema Markup for Rich Snippets

How Schema Helps Search Engines Understand Your Content
schema markup is what you need to add to your HTML to make search engines really understand your content. It is through structured data that you explicitly communicate the specifics of your content thus Google can create rich snippets with this information.
Rich snippets are visually appealing and attention-grabbing elements that are seen in the Google search results. They can show all kinds of additional information such as star ratings, images, prices, etc. These highlighted listings get more clicks than plain blue links and thus higher CTR results in more ranking benefits (indirectly).
Search engines can indeed read your content but do not get its context very well. Making use of schema helps to clear up the confusion. For example, you can tell the search engine, “here is a recipe,” or “here is a film review,” or “here is an event.” This clear identification is also helpful for better indexing.
Google has a list of schema types that it supports. Bloggers are the typical users of Article, How To, FAQ, Review, and Recipe schemas. Each schema type allows a different set of rich snippet features.
Types of Schema Bloggers Should Use
Blog posts and other online articles can be marked up with the Article schema which provides various information such as the headline, the pictures, the author’s name, and the date of publication. Google News and Discover are two places where content that uses the Article schema can appear.
HowTo schema is ideal for those who want to share their knowledge and skills via step-by-step guides. Numbered steps are displayed directly in the search results as a feature of HowTo schema. It is mostly the tutors and the instructors who make use of this markup. Before clicking users get a rough idea of the process.
FAQ schema represents questions and answers related to the topic of the main document. When present on a page, the FAQ schema enables the appearance of dropdowns accompanied by multiple FAQs in the search results. Extra search real estate is gained by this schema and the questions are answered instantly.
Star ratings can be added to review items within search snippets using the Review schema. Product reviews, service reviews, and book reviews qualify for this schema as well. The use of star ratings has a very significant impact on click-through rate. Content with visible ratings is the one that users trust.
Another schema that the food bloggers must use is Recipe. The reason being that cooking times, ingredients, and ratings get displayed for recipes in search results hence voice assistants can be integrated as well.
Breadcrumb schema allows the navigation path to be displayed on the search results too. The path can be seen like “Home > Blog > SEO > On-Page Checklist.” This way, users know the exact location of content on your website.
You can add schema markup using plugins or you can do it manually. Plugins such as Rank Math or Schema Pro for WordPress will automatically add the markup. Manual addition means the injection of JSON-LD code into the post headers. You can check your markup using Google’s Rich Results Test tool.
11. Optimize for Featured Snippets

Use Q&A, Bullet Points, and Tables
Featured snippets are a special place on the SERP (#0) above the first organic result. They are a kind of summary, condensed answer to users’ queries. Getting a featured snippet is a nice way to bring a lot of traffic to your website even if you are not in the first organic position.
H2 header questions tend to get more featured snippets. With Google’s favorite format for snippets being the “answer the question” method, questions in H2 tags are perfect for the job. You can start your headers with the most common questions about a topic, such as “How Does Schema Markup Work?” or “What Is On Page SEO?”
The paragraph directly following the heading should be answer text between 40-60 words in length. The typical snippet length is the same as that which can be seen in the paragraph. Answers are better when they are fully encompassing but without any need for further reading.
Lists in both bulleted and numbered format are common features in Google snippets. Lists provide small chunks of information that are easy to scan and thus they are popular for use with “best of,” “types of,” or “steps to” kind of queries.
When the query is an X versus Y one, a comparison table should be shown. A simple HTML or formatted text table qualifies to be displayed in the snippet. Keep your table to fewer than six rows for featured snippet optimization.
When definitions are given, explain them right away with the first couple of sentences. The definition snippets are given to “What is” queries and thus your definitions should be about 40-50 words long. You can use the following phrasing: “Term is a noun/verb/adjective that describes/means/refers to…”
Clearly featuring statistics and data is another good idea. Number snippets cater to queries such as “how many,” “what percentage,” or “how much.” Highlight the key numbers by making them stand out in both bold and contrasting colors so that they are more visible to both readers and algorithms.
Structure Content to Rank in Position Zero
Check out the featured snippets that are already ranking for the keywords you target. Your approach should be to search for your keyword and then investigate the format of the search results. In this way, you will be able to mimic the format of your content which Google actually prefers as it is indicated by the featured snippet it has already chosen.
If possible, place the desired snippet content in the first 200 words of the page. Google mostly picks up snippets from the top of the page. Sites that have the answers deep down have fewer chances of getting featured. The most valuable information should be put in front of the line.
The simpler you are the better when it comes to formatting as well. The snippet that is going to be pulled out is more likely to be a clean paragraph than a complex one. Don’t use formatting tricks that might confuse parsing algorithms. Clean HTML beats creative designs when it comes to snippet selection.
More than one snippet can come from the same post. Related-query snippets get their respective parts of the post. Few, if any, top posts can support more than one snippet position.
Keep an eye on snippet performance through Search Console. Queries where your content gets featured snippets will be shown in the Performance report. Soon, you will be leveraging successful snippet patterns and re-optimizing your underperforming content with snippet winner templates.
12. Track, Analyze and Update Content
Use Google Analytics & Search Console
The behavior of the visitors on your site is tracked by Google Analytics. It reveals which posts get the most traffic, how long people stay, and the source of the traffic. This information enables you to pinpoint what is working and where the gaps are.
Make sure to set up conversion tracking such as email signups, contact form submissions, and product purchases for goals. Goals bridge the gap between content performance and business results. If a post converts, it should be rewarded with more promotion and internal links.
Observe metrics like bounce rate and average session duration (per page). A post with a high bounce rate indicates poor user experience or intent mismatch. Similarly, low time on page means that the content is not engaging. Both these metrics are used to identify content that needs to be refreshed.
Search Analytics in Google Search Console is a tool that shows the performance of the site in search. It is able to inform you about the queries that bring the highest number of impressions, as well as clicks. You also get access to the average positions for your target keywords. This data helps you prioritize optimizations.
For each query, analyze impressions vs clicks. High impression volume with low click rate is a sign of poor titles or descriptions. If you have low impressions, it means that your rankings are weak. Each of these problems requires its own solution.
Since it is not always the case that your performance stays the same, it is good to go through Search Console data especially by the date ranges. Comparison between the current and the previous periods will reveal which of the trends are rising. Fluctuations in traffic can also be predicted with the help of seasonal patterns.
Opportunities for ranking can be identified in positions 5-20. These queries are relevant but need to be optimized for the purpose of reaching page one. Content will get to the first page quickly by updating it for those keywords.
Refresh Old Content to Maintain Rankings
Your rankings for certain keywords are likely to be affected if you don’t keep updating your website content regularly. Google has been known to prefer recently revised content especially for the topics that are time-sensitive. However, refreshing content is always a good idea even for evergreen content.
Review your articles 6-12 months after they have been published. If any of the information is no longer valid, then it should be updated. In addition, you can also update statistics, tool recommendations, and examples. You should supplement your existing posts with the new ones covering the latest developments.
The current year should be added in the titles as well as in the content. “SEO Checklist 2026” is more likely to pop up on the search results than “SEO Checklist”. Update dates yearly for the signals of freshness to be maintained.
Give more space and thought to what you have previously covered in a brief manner. Articles that have less than 1000 words are quite often not ranking well. In order to get to the length of 1500-2500 words, you can add sections, examples, and case studies. You will definitely outrank those that do not do a deep dive.
Old images and screenshots need to be changed. Images of old user interfaces hurting credibility. Updating tool images and UI designs. Fresh visuals are a clear sign that a site is actively maintained.
Besides fixing broken links, updating external resources is also part of your content maintenance. Over time, external resources are likely to get moved or disappear. Replacing broken links with the current ones is essential. Such maintenance avoids user frustration.
Make improvements not only in formatting but also in readability depending on the metrics. If bounce rates went upwards, the reason could be that the content urgently needs better structuring. Add more headers, bullet points, or visual breaks.
Just like you do with the content that you have moved, you should give attention to your refreshed posts by sharing them on social media, sending out emails as well as including internal links pointing to updated texts from fresh articles.
Monitor your rankings changes after updates. Refreshes will also be reflected in the positions in the Search Console. Pattern recognition of successful updates manifests itself while continuing the same strategy with is the other part of the getting more results from your own work. Unsuccessful updates teach about what is not to be done.
Make content audit a quarterly event. Every 3 months, review your top 20 posts. Keep the best performing ones optimized and up to date. Small regular updates outperform large one-time overhauls.
On-page SEO is essentially what makes it or breaks it for blogs. Where there is a will, there is a way, and if you want your work to be seen and read by more people, then you have no other choice than to go through it. Every single item that is covered on this checklist works hand-in-hand. If you skip one or two, your content will not be very effective.
To begin, you need to define your kingdom by pinpointing the keywords that are viable in the first place. Figure out the user intent and then build the content around it. Header tags, formatting, and other structural elements are all part of the process. A few of the technical elements, i.e., URLs, images, schema markup, are optimized. You track the results and then make the necessary adjustments based on your findings.
There is no magic wand that you can wave, and a single technique is guaranteed to get you the top spot on the SERPs. However, all 12 steps together give off compound effects, so doing all of them is definitely going to be fruitful. One is followed by the other in a natural chain of events. A good title will help you get clicks, a fast website will keep visitors from bouncing, good content will win you links, links will bring you authority, and authority will get you rankings.
The systematic following of this checklist for each post that you publish will serve you well. Design templates and checklists as part of your content management system. Let optimization become part of your habit instead of something you do now and then. Consistency wins over perfection.
Rankings don’t appear magically overnight. Search enginesingest, index, and evaluate your content, they need their time as well. The majority of pieces of content achieve their peak rankings 3-6 months after they are published. Thus, patience combined with proper optimization is the winner in the long run.
Make it a practice to check this list regularly as you keep perfecting your work. Concentrate on mastering one section first and then progress to the next. Start with the basics such as keyword research and header structure. When you get used to the basics, you can then start adding the advanced features like schema markup.
Your competitors, to a large extent, are just skipping these steps. They only write the content and hope for the best. Now you have systematic advantages that they don’t. So, use them smartly.
Start right now with optimizing your blog and see how your rankings go up. Pick one post that you will be working on next and apply these 12 steps to it. Keep track of your results. Compare them with the performance of the previously published posts. The numbers will be the ultimate proof that these steps work.
With every step up in rankings more visitors get to your website. More visitors bring more possibilities. More possibilities, in turn, grow your business or platform. Therefore, on-page SEO is not a chores to get out of the way, but rather the very foundation of your being seen on search.
The bloggers who are outranking you were the ones practicing these principles. And now it is your turn. Get moving. Optimize systematically. Measure results. Keep improving.
Your first page rankings are on the other side of continuing the practice. So, start now.